Most tents do not fail on the mountain. They fail in the driveway, on the first trip, because nobody practiced. Camping tent setup is really two decisions stacked on top of each other: which shelter you buy, and how you put it up when the wind picks up and the sky goes the color of a wet slate.
I have slept in tents for more than 500 nights, most of them within an hour of Bend, Oregon, where the forecast is a suggestion and the rain arrives sideways. I have watched a cheap dome hold through a June storm and a four-season shelter soak its owner because he pitched it in a drainage ditch. The tent matters. The pitch matters more.
This is the how-to: how to pick the right tent for the trip you are actually taking, and how to put it up so it stays dry.
Why you should trust me
I spent six years as a park ranger before I thru-hiked the Pacific Crest Trail in 2022, and I have kept a gear journal the whole way. Every night out gets an entry: where I camped, what the weather did, which piece of gear earned its place and which one I resented carrying at mile 12 on day 3.
That journal is why I do not review gear after one weekend. My standard is a 30-day field trial, a real rain test, and a pack-weight audit, which means I put every item on a scale and ask whether I would carry it up a pass. My boundaries are simple: no waterproof claims without watching the tent in actual rain, no recommendation without knowing what it weighs, and no review before I have slept in the thing enough times to stop being polite about it.
How I picked and what I check
Two tents are on this list because there are two jobs, and they do not overlap. One is a basecamp that sleeps a crowd and never leaves the car. The other is a shelter you carry on your back and pitch after a long day. Buying one tent to do both is how people end up with a 12-pound compromise they hate.
Here is what I check before anything earns a spot in the journal.
Capacity math. A "10 person" rating is a sleeping-capacity number, not a living-space number. Ten people means ten sleeping pads shoulder to shoulder with no room for a duffel. For a family of four with gear, a 10-person tent gives you the space to actually stand up and change clothes. For two backpackers, a 2 or 3-person rating means two pads and your packs inside.
Packed weight and base weight. Base weight is everything in your pack except food, water, and fuel. It is the number that decides whether a trip is fun. If the tent is going on your back, it has to be light enough that you stop thinking about it. If it is going in the trunk, weight is irrelevant and interior volume wins.
Waterproofing, verified. Every tent claims waterproof. The claims that matter are the ones about the fly coverage, the bathtub floor, and whether the seams were sealed at the factory or left for you. I check whether the rainfly reaches the ground, whether the floor has a raised lip, and whether the guy-out points are reinforced. A tent that keeps rain off the mesh but lets it pool under the floor is not waterproof, it is decorative.
Pitch time. A tent that takes 20 minutes to pitch is a tent you will sleep next to in the rain. Anything over 10 minutes for a two-person shelter is a design problem, not a skill problem.
Ventilation. Condensation soaks more sleeping bags than leaks do. A tent with no mesh and no vents turns your breath into interior rain by 2 a.m.
Stakes and guy lines. The hardware in the bag is usually the weak point. Bendy stakes on the first use is one of the fastest ways a tent loses me, so I plan on replacing them.
The two tents that cover both jobs
These are the two shelters I would hand a friend depending on the trip.
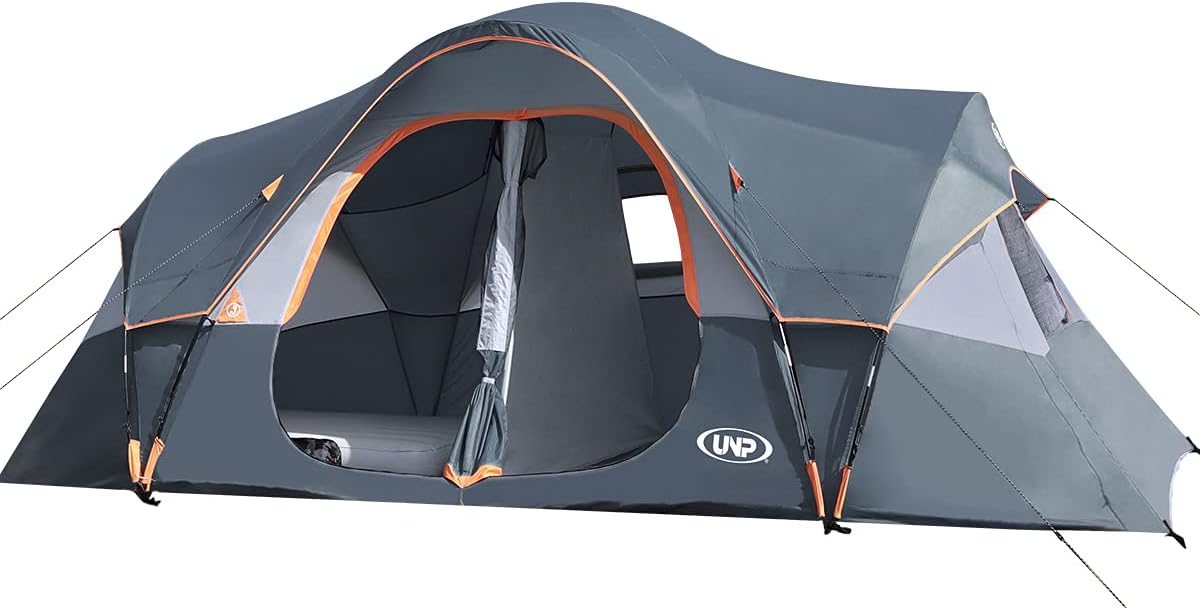
Best for family basecamps: UNP 10 Person Tents for Camping Family Outdoor Camping Tent
 Visit on Amazon →
This is the car-camping answer. A 10-person family tent is a basecamp: it goes from the trunk to the site, it stands up tall enough to change clothes inside, and it swallows four people plus duffels plus a cooler you should have left at home. Check current Amazon price.
The reason a tent like this earns a recommendation is not the sleeping capacity number on the box. It is the interior volume. Family camping fails when everyone is jammed into a shelter sized for the number of people on the reservation, not the number of people plus their stuff. If you are sleeping four, buying for ten is not overkill, it is the difference between a good trip and a mutiny.
Two things to do the day it arrives. Set it up in the yard and time yourself, because a tent this size wants two people and a plan. Then check the stakes and swap them for something that will survive a hammer, since the stock set is usually the cheapest part of the package.
Flaws but not dealbreakers: This is a car-camping tent by definition. If you have to carry it more than a quarter mile from the vehicle, you have chosen the wrong tool. It also needs real airflow at night, so leave the vents open even when it looks calm, or you will wake up with condensation on the inside of the fly.
Anyone with kids, a truck, and a site they drive into will get years out of a shelter like this.
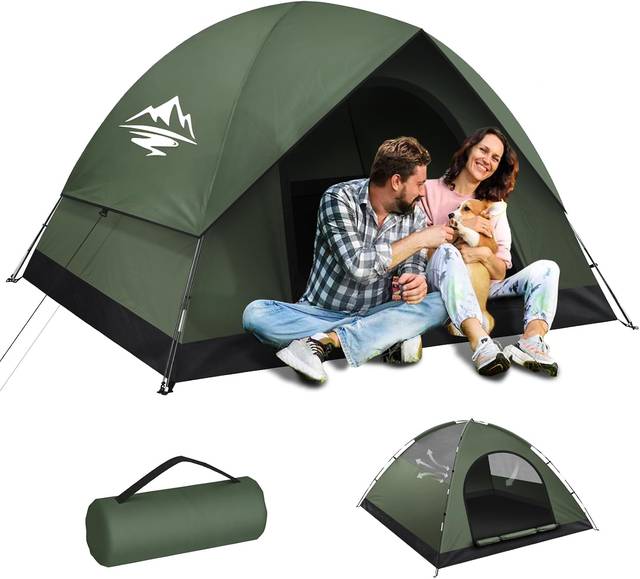
Best for backpacking pairs: Tents for Camping 2/3 Person, Waterproof Camping Tent with Rainfly
 Visit on Amazon →
This is the one that goes on your back. A 2 to 3-person tent with a full rainfly is the classic backpacking shape: light enough to stop thinking about, big enough for two pads and two packs, and covered by a fly that sheds weather instead of collecting it. Check current Amazon price.
What I look for in this class is the fly, not the tent. A rainfly that reaches down the sides and stakes out away from the body is what keeps you dry, because it creates an air gap between the weather and the mesh. A fly that stops halfway down leaves the walls exposed and turns windblown rain into a fine mist inside the tent.
For two people, buy the 3-person version if you value your relationship. For one person, the 2-person rating is a palace. And regardless of which you pick, seam seal it before the first trip if the seams are not taped, because factory sealing is a promise that expires.
Flaws but not dealbreakers: Ultralight shelters in this size class trade interior height for weight, so expect to dress sitting down. Pair it with a footprint or a ground cloth, because a thin floor over sharp granite is how pinhole leaks start.
Anyone hiking in, bikepacking, or camping out of a small car will find this is the size that actually gets used.
The actual setup workflow
This works for any dome, cabin, or tunnel tent. It is also the order that keeps the inside dry if it starts raining while you pitch.
Step one: Pick the site like a ranger. Flat ground, no dead branches overhead, no low spot where water will collect. Stay 200 feet from lakes and streams, both for Leave No Trace and because water finds the lowest ground and that is where you are sleeping. Look up before you commit.
Step two: Lay everything out and stake the corners. Pull the tent body out, find the door, and orient it away from the prevailing wind so you are not fighting the fly at 2 a.m. Stake the four corners, then go back and re-tension them. A floor that is not flat and tight will pull the poles out of shape.
Step three: Assemble the poles. Do this on the ground, not standing up. Let the shock cord feed each section together instead of forcing it. If a pole section will not seat, you have the wrong section, so stop before you crack a ferrule.
Step four: Raise the body. Thread the poles through the sleeves or clip them to the body, then lift the structure in one motion. Two people make this trivial. One person should work from the upwind corner and let the tent bend instead of fighting it.
Step five: Fly it before it rains. Put the rainfly on immediately, even on a clear night. The fly is the part that keeps the inside dry when the weather changes at 3 a.m., and putting it on over a dry tent is far easier than doing it in a downpour. Stake the fly out so it does not touch the body. Contact points wick water straight through.
Step six: Guy out the windward side. Stake guy lines at roughly a 45-degree angle to the ground, in line with the seam they support. A guy line at the wrong angle just pulls the stake out. On a breezy night, the windward lines are the difference between a taut shelter and a tent that folds onto your face.
Step seven: Open the vents. Cross-ventilation is what keeps condensation off your bag. A closed tent on a cold night turns your breath into interior rain, and then you blame the tent for being "leaky" when the water came from you.
Step eight: Seal the seams and re-proof the fly. Once a season, set the tent up in the yard, seam seal any untaped seams, and reapply a waterproofing treatment to the fly and floor as the coating wears. This is the step everyone skips and then complains about.
Step nine: Dry it before you store it. Pitch it in the yard for an afternoon after every trip. A tent packed wet grows mildew, and mildew eats the coating that makes it waterproof. Storage kills more tents than weather does.
Waterproofing is a promise that expires
Every tent is waterproof on the showroom floor. The question is what it does after 20 nights of UV, abrasion, and folding along the same creases.
Three things decide it. The first is the rainfly, and specifically whether it creates an air gap between the weather and the sleeping area. The second is the floor, which should have a raised bathtub edge so water running across the ground does not seep in at the seam. The third is the seams themselves, and this is the one you control. Taped seams hold for a while. Field-sealed seams hold longer, because you can reapply them.
If your tent starts leaking, diagnose before you replace. Water on the walls after a cold night is condensation, not a leak, and the fix is ventilation. Water beading under the floor is a ground cloth problem, and the fix is a footprint sized smaller than the floor so it does not channel rain underneath. Water coming through a seam is a seam problem, and the fix costs a tube of sealant.
What did not make this list
Instant cabin tents with pre-attached poles are genuinely convenient, and they are also heavy, bulky, and prone to pole failure at the hinge. Great for a backyard, questionable for a windy lake shore.
Single-wall trekking pole shelters are the lightest option going, and they are also the least forgiving, because they have no fly to create an air gap and they condensate hard in humid country. That is a specialist tool for a specialist trip.
Four-person dome tents sit in the awkward middle. Too heavy for two backpackers, too cramped for a family of four with gear. The two tents above skip that compromise entirely by being honest about which job they do.
What this all costs
I am not going to quote prices here, because they move and you can check them at the links above. What I will tell you is how to think about the cost, because a tent is one of the few pieces of camping gear you buy once a decade if you treat it well.
Do the math per night. A shelter that costs more than a budget option but survives five years of trips works out to a few dollars a night, and it is the difference between sleeping and lying awake listening to the fly flap. That is cheap.
Then budget for the accessories that make the tent last: a footprint or ground cloth, a set of stakes that will not bend on the first rock, a tube of seam sealant, and a waterproofing treatment once a season. That kit is a small fraction of the tent itself and it roughly doubles the service life.
The tent that costs the most is the one you buy twice because you picked the wrong size for the trip you actually take.
The short version
Pick the job first. If the tent rides in a car to a site you drive into, buy interior volume and standing height, and the 10-person family shelter is the right shape for four people and their gear. If the tent rides on your back, buy light and weatherproof, and the 2 to 3-person shelter with a full rainfly is the right shape for two.
Then practice the pitch. Ten minutes in the yard turns into ten minutes in the rain, and ten minutes in the rain is the whole point of owning a tent at all. The mountain does not care about your gear list. It cares whether you put the thing up correctly before the weather arrived.